Monday, February 10, 2014

American Girl Birthday/Tea Party

Last summer, we visited the American Girl Store in Chicago. While we were there, we had lunch in the cafe. My daughter immediately said she wanted to have her next birthday party there! Since we are from NC, I laughed and told her that wouldn't be possible. I did tell her that we could plan our own American Girl party though. So that's how all this craziness happened!

I designed about 10 invitations until I finally settled on this one!  Madison loves hearts and flowers, so this was a good combination for her! The picture was taken at the American Girl Store right after she got Caroline. We held this party in the same room my bridesmaids luncheon was held almost 12 years ago. It was so sentimental to be hosting my daughters 5th birthday party in the same location!


For our last few birthday parties, I've used Diddy Bop Bakery out of Gibsonville, NC. She is SO talented! Not only are her cakes beautiful, but they taste amazing! The cake is one she had done before and Madison and I both loved. I asked her to add the wooden number 5. I ordered the mini Caroline doll from the American Girl store. I love how it turned out!!


For the activities at the party, we decided it would be fun if all of her friends got their baby dolls ready for a fancy tea party. When they first got there, they visited Caroline's Dress Boutique. I made pillowcase dresses for all the girls to put on their dolls. 


I made all of the signs for the tables using the same design from the invitation.


After they were dressed, they visited Marie Grace's Hair Salon! I got tons of hair accessories at the Dollar Tree! Then I gathered up all of Madison's play hair toys. It was crazy all the things I found laying around the house! I got her the doll hair salon chair as a birthday gift. It was huge hit at the party. All the girls loved it. This is the Our Generation Target brand chair. Oh, the silver trays are also from the Dollar Tree. I use these for parties all the time. They wash in the dishwasher and don't rust! 


After the hair salon, they could put on fake make-up and painted their nails (with fake polish) at Saige's Beauty Parlor. I had several almost empty make-up containers that I cleaned out. Once they were clean, I poured cheap nail polish in them and let them dry out. Then I found old brushes and some cheap lip stick applicators that put out for them to use. For nail polish, I just emptied out some of our tiny bottles and cleaned the brushes.


The last stop was at Kit's Jewelry Studio! I found little pop beads for them to make necklaces and/or bracelets for their dolls. These beads were also at the Dollar Tree.


After the dolls were dressed and ready, they had a tea party! I set up tables for just the dolls to sit at. I wanted it too look like little girls set the table for a party. Once again, I gathered up all of Madison's tea pitchers and fake party food. We scattered that throughout the table. 


I could NOT find tea cups for the baby dolls that were the right size. I finally found this idea on Pinterest and knew it was perfect! I used the top part of an Easter Egg, a large button, and pearls. I used the glue gun to attach the button to the egg. Then I cut a small strand of pearls (I think I used 5 pearls on each handle) and then used the glue gun to attach these as well. I love how they turned out! 

At the American Girl Cafe, they give everyone a cinnamon roll when you sit down. I thought it'd be fun if we did the same. They served tiny ones to the dolls and regular size ones for the girls. It was so cute! 


I found these vases in the Dollar Spot at Target. I thought they would be perfect for the doll table! I made the flower out of vinyl on my Cricut. Then just put one gerber daisy in each vase.


I found all the fabric at a store in Wilmington, NC. They have beautiful fabric and everything is $7.99 a yard. I've been wanting to start a collection of table linens and thought this was a good time to get started! As soon as I saw this fabric, I knew it would be perfect! I love them both! I ran out of time, so my mom helped me finish sewing them!


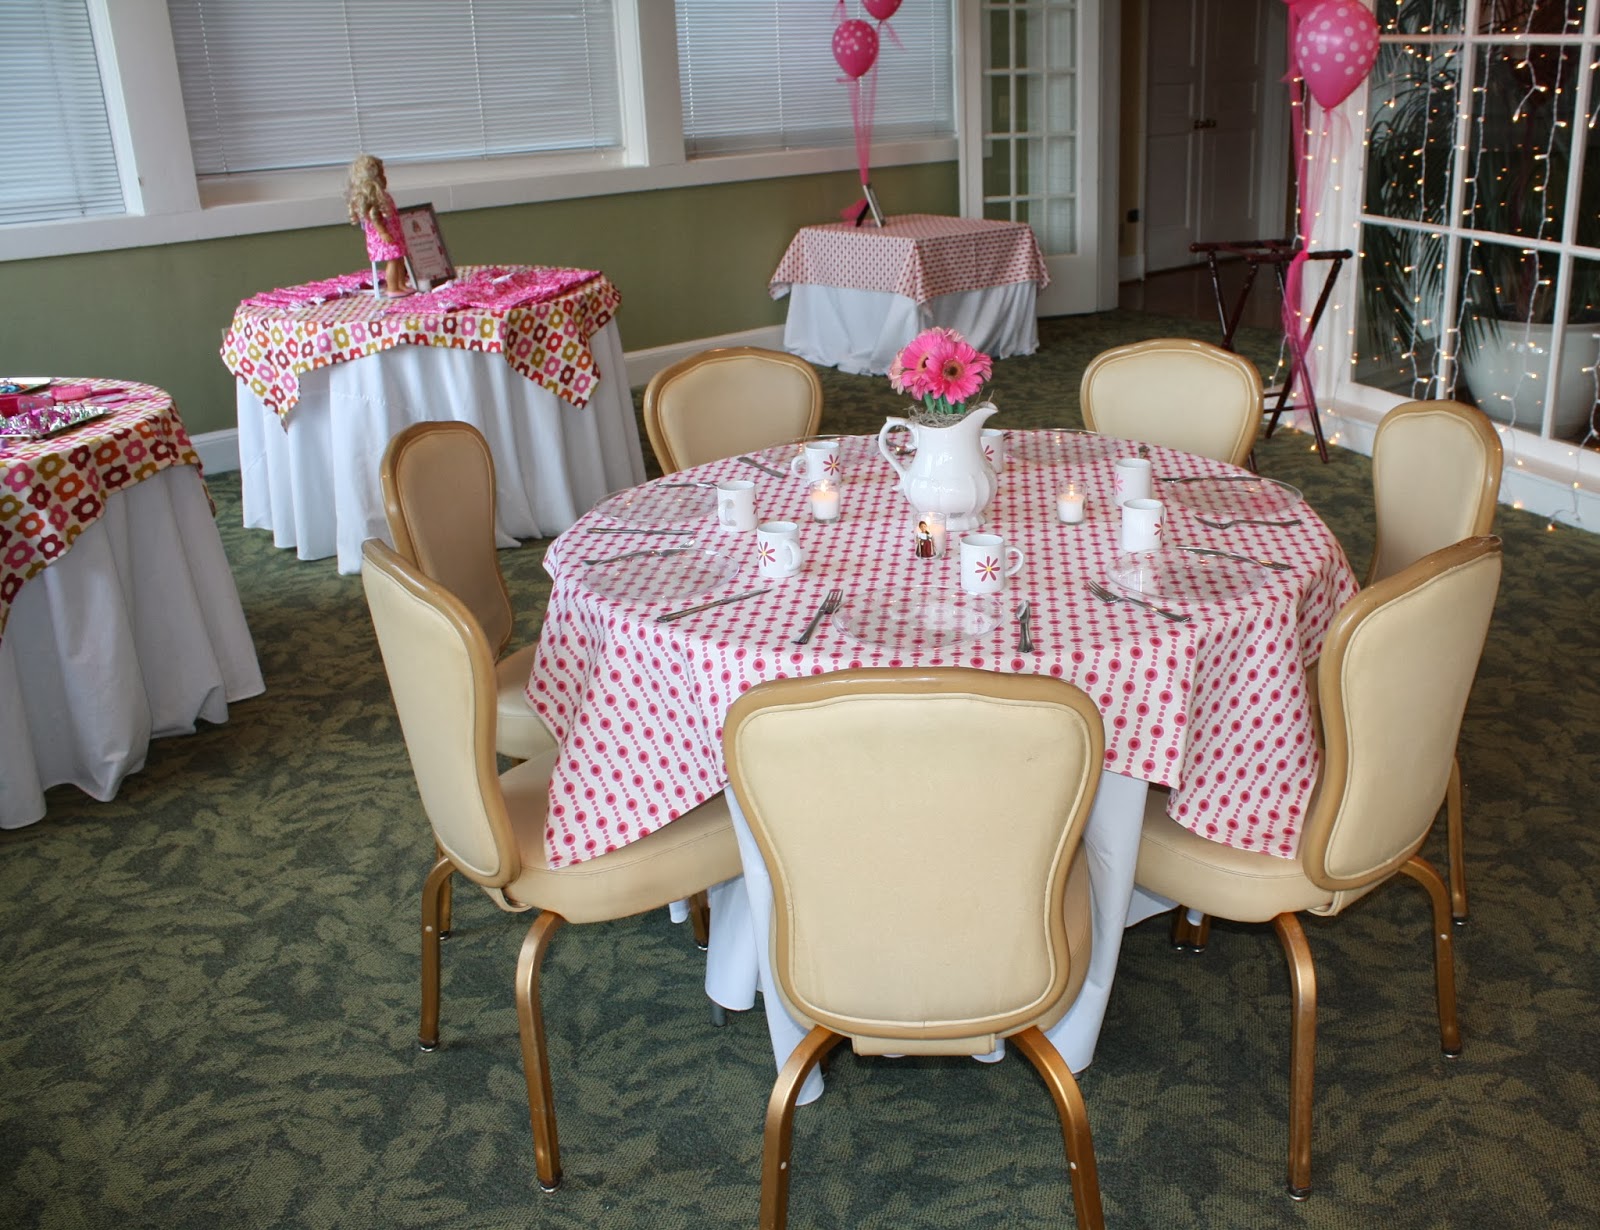
For centerpieces, I found 4 large pitchers and put gerber daisy's in them. I'm not very good with flowers, so this was the best I could do!! I bought a pack of American girl stickers from Michael's that I put on the candles around the centerpieces. Madison also used them on the envelopes when we mailed the invitations. 


When looking for tea cups for the baby dolls, I ordered these thinking they would be small enough. When they arrived, I realized they were too big for the dolls, but would be perfect for the girls. Madison loved them and was so excited that she would have a REAL cup. I cut a lot of flowers on my Cricut and put one on each side of the cup. I tried to make them look like the ones they gave us for the dolls at the American Girl Cafe. I ordered these mugs from Discount Mugs for about .45 each. The tiny silverware is in the party section at Hobby Lobby. I've found lots of uses for them at parties! 

Here are a few more pictures of the room! We all had so much fun! It was a special day to spend with our girls! I still can't believe my baby girl is 5!!


Friday, May 24, 2013

It's a WRAP!

I can NOT believe another school year is over! So sad that Madison only has one year of Playschool left! :(
I planned this years party along w/ 2 other moms in the class! I saw an invitation on Pinterest that said, "it's a wrap". We thought that could be a really cute end of the school year party theme!

One of the other moms set everything up at our local children's museum (same place as the princess party). I was SO happy I wasn't hosting it at my house again this year!

I designed this invitation by using images I found on Google. The polka dots boarder was a little fuzzy. I need to figure out how to fix that before I have things printed!

You guys know by now that I love water bottle labels! :) I realized the morning of the party that I forgot to make some. I made these while the kids were eating breakfast! I taped them on the bottles as I sat them out on the table. Nothing like a last minute decoration! ha!
I promise we did have "real" food! We just kept that on a separate table since we were going to serve that to the kids. This was our SWEETs table! :)

Madison found these cute plates at Hobby Lobby and we had to buy them (even though I had already bought red ones from the Dollar Tree).

 I found a bag of assorted sized foam balls at the Dollar Tree. I cut pieces of tissue paper and wrapped it in cellophane. Then twisted the ends and used a little glue to hold the ends. I let the kids spread these out on the table and I put them in the centerpieces.


We found these containers at Hobby Lobby. I knew they would be perfect to use for centerpieces! I used round floral foam (again from the Dollar Tree) and wrapped it with tissue paper and iridescent cellophane. 

More views of the tables. I added pictures of all the kids from her class to the centerpieces.

I had planned to make my sugar cookies, but ran out of time. I found these at Walmart and they were labeled "Peanut Free" (which is a requirement) so I grabbed them! I cut pieces of cellophane and wrapped them up to look like candy.

Party favors! Shortly after decided on "sweets" theme, I saw these cute soda pop bubbles at the Dollar Tree. I thought they would be cute!

A little party favor for the teachers! 


Thursday, May 2, 2013

Making Water Bottle Labels...

Earlier this week, I had a friend asked for the template I use to make my water bottle labels. When I decided to make mine, I didn't use a template. I just messed around with it until I figured it out. Since I took the time to sit down and write out step by step instructions for her, I figured I would share it here as well. I am sure there are easier ways to do it, but this is how I make mine! Hope it is helpful!

1- Find an image by doing a google search (needs to be rectangular)
2- Copy and paste the image into a word document. Leave the page orientation as portrait.
3-  Measure the width of the label on the water bottle.
4- Once you have the width, right click on the image and choose "size".
5- Adjust the "height" to fit the measurement of the label.
6- Center it on the page.
7- Copy and paste until the page is full. Normally you can get 4 on a page.
8- Save as a PDF
9- Print on cardstock
10- Use a paper cutter to cut paper all the way across. when you tape it on the bottle, the paper will overlap a little, but is a pretty good fit!
11- peel off the labels from the bottles
12- tape one side wrap around and tape again
 
I get all my stuff printed on cardstock at Office Max. They charge .61 a page. Their quality is great! You can upload it on their website and select the store you would like to have it printed.

Here are pictures of the ones I have made:
 
Before cutting, this is what the ones for Madison's party looked like. I cut the paper all the way across so it is a strip of paper.
 
Here is the finished product!
 
Carter's were a little more complicated. My sweet friend, Morgan, shared some of her design knowledge with me. These are actully 2 Google images that I had to layer and resize. I'll have to do that a few more times to be able to give out instructions!

Wednesday, May 1, 2013

Open House!

When I'm not planning a party, I enjoy making crafts or sewing clothes for my daughter. Recently, a friend decided to host an Open House for any of her friends that sell things. I decided to set up a table just for fun! It took place last weekend and I had so much fun! I'd love to find a way to do this more regularly! Here are a few pictures of my table and things that I sold!

My little table! If I ever do it again, I definitely need more space! I had a card table set up with all my products and then a TV table for my cricut. I personalized the items as they bought them, so it would have been nice to have a larger working space. Next time I'll know! :)

I give a lot of these round candles away as gifts. At Christmas, I cut a red Christmas Tree and put one on the candle holder. They were so cute! I gave those out to all of our friends and family as a small gift.  This particular one had an apple w/ an H (for the teacher's inital). The tag was a sweet poem I found on Pinterest for teachers that went along w/ a candle. 

I also give away a lot of these candles! I think they are so cute! It is just a glass cube with an initial cut out. Inside, I put a small votive candle and surround it with glass marbles. Depending on the holiday, I put candy to match the season around the candle. In the winter, I used Epson salts b/c it looked like snow! 


This is the same as above, just no candle. Some of my friends have taken the candle out after it burns out and instead of replacing it, they make it a candy jar. Perfect for your desk or in your living room!

These have been a huge hit! Cute little post-it note holders made out of acrylic frames. I sold so many of these at the show and have orders to do more!

These are made to hold your cell phone. I plan to take this one for my desk at work! It would also be good for your kitchen counter or nightside table. Anything personalized is cute, right?

Personalized Hand Sanitizers! These were also a big seller! Everyone uses it, so it is a perfect gift!

More sanitizers! I love the baby carriage ones! Perfect baby shower gift! Just a sweet little reminder to friends, to clean their hands before holding the baby! Would also be cute in a nursery on the changing table.

I had these planters left over from my son's bday party. I wanted to find a way to get rid of them! I added 3 seed packets and a garden shovel. I used the shrink wrap to hold it all together. I added a decorative pinwheel (that can be put in the flowers) and put on a tag that says "thank you for helping me grow!". 
Here are the things that Kelly chose as her "Hostess Rewards"! Thanks so much for hosting, Kelly!


Wednesday, April 24, 2013

Carter's First Birthday! Roar!

My sons first birthday party was probably one of my favorites. His nursery is a dinosaur theme, so I decided to go with that for the party theme as well. His party was the weekend before Easter. I thought it would be fun to have a Dinosaur Egg Hunt as the main activity for the party! Everything was just perfect!
For his birth announcement and party invitation I used the same colors as his nursery. So that was an easy color scheme for the party! I used a company on Esty to design the invitations. I sent her a picture of his room and she went from there. The dinosaurs at the top are the same as the dinosaurs on his bumper and the paintings we have hanging in the room. The stripes at the bottom are the same as his bed skirt. They are just perfect in so many ways! I found the suckers online and put a round foam ball wrapped in tissue paper into the bucket. I used stickers from the Dollar Tree to decorate the bucket.

 I found these plates on Amazon and thought they were adorable! They were the right colors and cute dinosaurs for a 1st Birthday (some are a little too scary!). The buckets were from Hobby Lobby and again I used Dollar Tree stickers to decorate them.
For the mantel I used my Cricut to make a banner. I printed pictures from each month of his first year. The little dinosaurs were actually on a banner that I cut apart and put onto sticks. Then I put them in planters.


My mother-in-law made this diaper cake for his baby shower and it was in his room. I thought it was too cute not to include it in the party! I put it on the sunroom table w/ some wooden dinosaur cut outs (the kids could color them if they wanted too).

Oh this cake! I loved it! Tricia at Darlin' Designs (http://www.triciasdarlindesigns.blogspot.com/) made Madison's first birthday cake as well. I sent her a proof of the invitation and she matched it exactly! I used Spanish moss on the table b/c I thought it look like it went w/ dinosaurs! ha! 

I used my Cricut to make this little banner for his high chair. 

 His Smash cake was just a small little cake from Harris Teeter. I added the dinosaur and the candle. I found the bib at a cute little Etsy shop.
Somehow I didn't get many pictures of the food table. We did dinosaur shaped chicken nuggets for the kids and subs for adults. Very low key, but everyone was happy!

My daughter and her cute dinosaur dress! She was hunting for eggs! For the big kids I put a variety of candy and dinosaur prizes in the eggs. 

The birthday boy! Hard to believe that was a year ago! For the smaller kids we had a separate hunt. In their eggs, I filled small jewelry ziplock bags with goldfish and puffs. 

I found these buckets at the Dollar Tree. Not sure why I didn't use my Cricut to cut out letters for their names? I used letter stickers and dinosaur stickers from the Dollar Tree. Each guest got a bucket and they filled it with eggs as their party favor.

The Dinosaur Egg Hunt was a big hit! I highly recommend it even if it's not close to Easter! It was a fun activity that they all enjoyed!